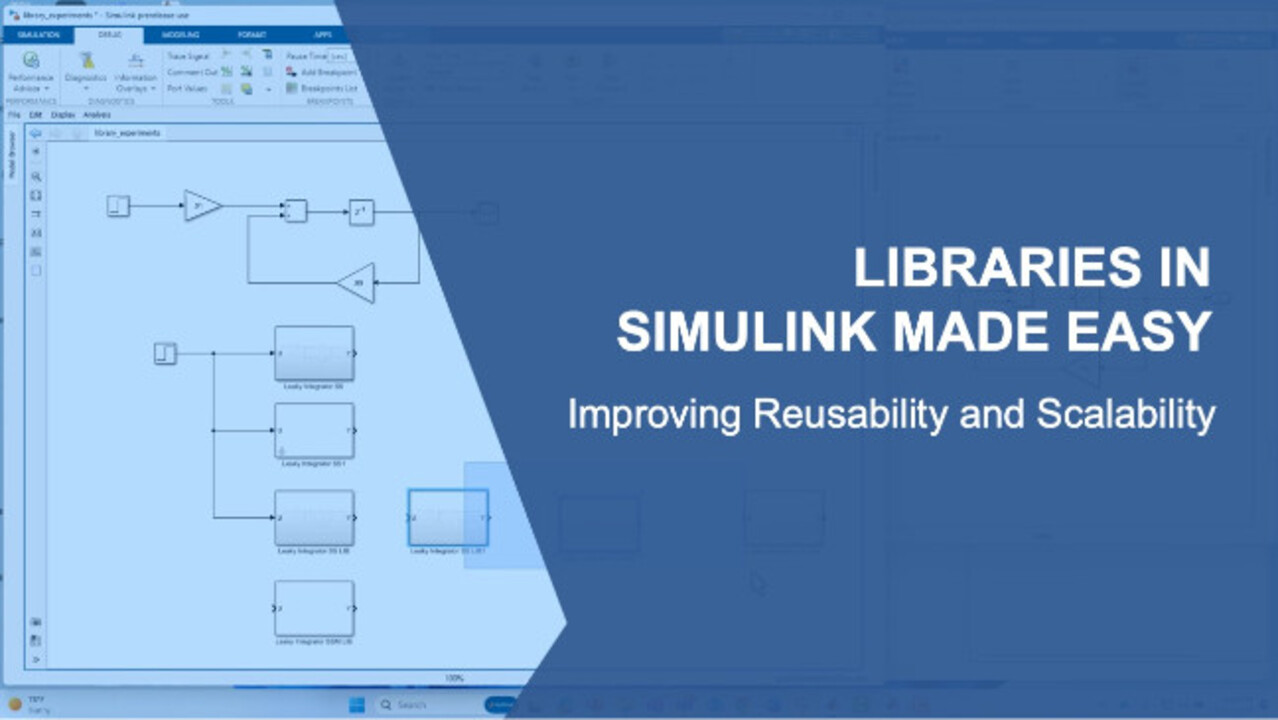
Libraries in Simulink Made Easy
Have you ever needed to add more structure and increase the usability of your Simulink® models? If yes, then Simulink libraries are probably for you. Libraries are a generalization on the typical subsystem paradigm in Simulink. They allow you to modify and standardize multiple instances of a subsystem from one central location, i.e., from the library. But adding structure by way of libraries also necessarily imposes more constraints—and these added constraints can frustrate users new to libraries.
This how-to demonstration can greatly lessen that frustration. You’ll be walked through the motivation for using libraries, the classic why. You’ll learn how to create libraries, and next, most importantly, how to edit them. Editing is important, especially for those who still need the flexibility offered by subsystems but need to work in the structured environment of libraries. In addition, you’ll be shown how to work with libraries both interactively (point and click) and programmatically (scripting).
Published: 20 Nov 2023
Hello, this is Kerry Schutz with MathWorks. And in this video, we're going to have fun with Simulink library. So we're going to learn how to create them and modify them, and just learn how to be comfortable with them.
So the first thing I'm going to do is, we are going to just start with a new model. And we're essentially starting with a blank sheet of paper. I'm going to call this library experiments. OK.
All right. So I'm going to open that model up. And this is not where we're going to create the library. This won't be our library. This will be where we use the library components. We'll use the instances of them.
All right. So the first thing I'm going to do is just create some very simple test design, and I'm going to start pulling in components, like an adder. And I'm just typing in the workspace of my model to pull in names of components really quickly, start wiring them up.
I'm going to pull in a game block. Why are all these things up? Another-- and I'll put in another game block, as well. And I'm going to create a simple leaky integrator, or a low pass filter. We'll put that like that.
We'll create a little feedback loop here. In discrete time, it's going to be a positive feedback. And I'm going to give these just hardcoded values, like, 0.01 for a feedforward term, and 0.99 for a feedback term. So these, in the typical case, they would sum to 1.
And then I'll put in a step signal here so I have something to test it with. I'll give it a sample time of 1 millisecond, and we'll step at time zero to a value from zero to 1. And then we'll bring in a scope and we'll just look at the output here.
And this is-- again, we haven't created any library yet. We're just creating something which will become a library component. So let's run this for about ten seconds or, let's say, a second.
I'll pull the scope up so we can see it run over here. I'll hit Play on the scope, could hit Play over here. And you can see it ramps up. Instead of having a perfect infinitely fast rise time, it's got some roll up-- rise time associated with it.
All right. So that's our classic simple leaky integrator with this. You could compute the time constants from these coefficients that are used.
All right. So now, what if we wanted to get into the whole area of libraries and reusable components? Remember, the whole purpose of a library is that you create one standardized version of something. It's been tested, it's been documented, whatever. It's been standardized in some way.
And now, your teammates, or your customers and everything, can pull from that and just use it so-- without worried about whether it's been tested or proven out. So I'm going to make-- let's just go ahead and make these gains a little larger, let's say.
And a couple things here. One is, we could-- instead of a library, we could say let's just copy this down. And instead of having it all flat in the whole spirit of modeling and keeping things concise and hierarchical, we could create a subsystem out of it. Right click, create subsystem. So I can do that.
So now, we could say it's the same thing. I'm going to rename the input something that maybe I like, make sense to me. Call that input u, output y. You could give that a name like leaky integrator subsystem.
OK. We could test it the same way. We could either wire it up like this with the same input and go here. Or we could put it on its own scope, either way. If I say Control Z, Control Z. I'll just put another one down here.
We're not going to test all of these individual variations out. We're assuming right now this just works just to expedite things. This will be scope 1. If I pull up scope 1, you can see it just looks like-- just like scope. And, of course, we could do differences and compare them, but no need to go to that trouble here.
All right. So now we've gone from a flat design to some level of hierarchy in Simulink. But now, what about reusability? Of course, one form of reusability is just to say I've got a subsystem, just copy it, just copy it, just copy it, just copy it. And that would be one way to guarantee that we've got reusability of this component, OK? That's one approach.
But, of course, if you do that, if you say, hey, give me this, give me this, give me this, everybody is now free to go off and tweak this and maybe you don't know what they're going to do. Maybe they'll go in and change it to a minus sign or something. They think maybe it should have been negative feedback.
Somebody changes it, and now when you're running it, it doesn't work so well anymore. So, for instance, if I just made that simple change to the system and put that over here, like that, wire it up. Let's just see what happens.
OK. Let's call up scope 1. OK. We see we got a very, very different result. In fact, I'll put them on two traces and we'll auto scale. OK. Very, very different results with that change of sign. So it's easy to get into a situation where someone copies a subsystem, they modify it, it's not working the same anymore.
So libraries help work around that. They keep things nice and standard and unchanging. And they only give parameters-- only allow access to certain parameters in the model.
OK. So I'm going to delete those instances of that subsystem. Let's take this maybe one more step. Maybe you don't want the user going under here and modifying these settings anymore by typing here and typing here, and remembering they must sum to 1. So you say, OK, I'm going to create a subsystem out of this-- or, no, a mass subsystem. So I'm going to put on here a mask. Create a mask.
OK. Now, when I do that, I've got the ability to do things like add an edit box. Basically, I've got my own user interface here. I'm going to say, well, there's a feed forward gain, and I'm just going to call that-- for short, call that ff. That'll be a Matlab value. I can give it a default value of something like 0.02.
OK. And I can do the same thing, I can add another-- for the feedback. And I can say, let's go and type feedback gain. I'll call that fb, for short. And I'll give that a default value of 0.98.
OK. So if we do that, I will just save that mask. Notice when I did that, and I'll close this out now. When I do that, you'll notice I've got a little arrow in the lower left-hand corner that's indicating it's a mass subsystem. We want to look under the mass, click on the arrow. You can see what I just did.
Now, notice it's got-- still, I've got my 0.01 and 0.99 hard coded. So essentially, it's very misleading. Now, if I double click on this, it says, hey, my feed forward gain is 0.02. My feedback gain is 0.98. Hum.
But if I go underneath it, it says, hey, it's 0.01, 0.99. That's not going to work. So what you need to do is leverage those mask variables ff here. Notice it changes to 0.02 and changes to fb. I'll just change this to 0.9 over here.
And now, anytime we change something on the mask, like, let's say we go to 0.03 and 0.97, if you go underneath them-- if we go underneath the mask now and we double click on these, it'll say 0.03 and 0.97. Good.
All right. So now, we've got a masked version of the same thing that we had above. So we don't have to go underneath it to change the settings. You can do everything at one spot. So if you had multiple levels of hierarchy, you could see how that would be convenient. You're not drilling through the hierarchy to find these parameters to change.
OK. So, of course, we could test it, make sure it's behaving the same. And that's all well and good. I'll change it back to what we started with here.
OK. So that's another game. And, of course, this is also infinitely reproducible. You just copy it. Again, the snag is people are always free to go underneath the mask and go in and start hacking it and changing it.
Now, you may not want that. So that's, again, where libraries come in, kind of prevents that easy modification when people are using this model so you don't end up with chaos in terms of the same-- seemingly same block behaving different ways.
So now, let's get into library creation next. If we want to create a library version of this, we could say, new library. I'll say blank library. Pull that over here. We'll make it a little smaller since I'm not going to be putting much in this library.
I'm going to pull in a subsystem version of this with no mask. And I will pull in the masked version and for each one, I'll just say subsystem, and I'll put m for mask subsystem with mask. And this one without end. I'll also just put a lib here just to-- normally, you wouldn't do this but I'm just-- for educational purposes just keeping people reminded via a name that it is a library.
So now, it says library here. Notice on the Simulink model over here, well, the name of my model was library. I named it that. But this name could have been anything. This is not a library. If it is a library, it says library colon. OK. So let's save that.
Now Oh, we'll call that whatever. We'll call that my leaky-- we'll call that my leaky, whatever, integrator. Underscore .slx. OK. It's still an slx file, even though it's a library.
So now, we can pull in a library component where no mask, or we could pull in-- just squeeze this up a little bit. Let's go over here, here. Or we could pull in a library version with a mask, OK? And, of course, all of these should behave and run the same exact way as far as numerical performance and speed, things like that, accuracy and speed.
However, if you try to make a change now, so you try to go into this block and say, hey, I want to change this. It says you can't do that, OK? It gives you a warning. Well, it says, maybe you can but you'll need to disable the link first, OK?
And, of course, if you want to prevent that, you go over to your library and you say, I want to have locked links and not an unlocked library, but a locked library, OK? So now, everything is locked up nice and tidy. And if you go over to that same block over now and try to make a change, it just says you can't do it. It doesn't even give you the option to disable the link to the library. And that's the safest way when you're creating reusable components.
OK. So now, we've been given our-- we've created and/or we've been given some library blocks. And I'm going to make sure, for whatever reason, it doesn't show the name by default. I'm going to just show them so I'm going to right click, say format, and show block name on. So we can see then it just tells us that it's a library block.
If you want some indication on the block without typing a name, a special word lib, denotes it's a library, you can also put annotation on your models. I'm going to blow this up a little bit, make it a little wider. You can have information overlays-- you see what I mean-- that says, show all links, let's say.
And now, you see on the library blocks you've got like a little chain link there that tells you it's linked to something. It's linked to a library. If you right click on that block and you say-- let's see here-- locked library link, and you say go to library, it highlights it. It brings up the library and it highlights the block of interest.
So the same way with this one. I close the library. But if I go to here-- whoops. So I right click on it, say, locked library link and say, go to library it'll open the library up and then highlight the block that it corresponds to.
OK. All well and good. This is great so far.
Now, of course, now we get into the benefits of libraries. Of course, just like the other library, you can step and repeat-- just like subsystems, you can step and repeat this as many times as you want to. The difference is, you can't just go in and modify what's underneath the hood the way you could with subsystems.
Sometimes that's an advantage. Sometimes that's a disadvantage. If you're shooting for maximum control, you want a library blocks. If you're shooting for maximum flexibility, you would choose subsystems.
OK. So now, let's get into some little nuances of libraries. Let's say, for instance, you did want to make a change to the library in some way. Now, you've got two options here.
One is, you could change the library block over here in the repository, in the library file. Or two, you could change the library, the functionality, over in the test bench in your model instance. They both have advantages.
Now, myself, I typically prefer to modify things in the test bench because I need to test out the changes. So, again-- but either approach is workable. So the first thing I'm going to do if I want to make a change over here whether I want to make a change to the mask version or the unmasked version. Let's just say-- let's just take that library link notification off. So I'm going to click on the information overlays.
Otherwise, it should be coming up here. It's taking its sweet time. Let's see. Let's have it come up here. There we go. Let's take off the links. We won't show those. We can put disabled links, sure. Why not?
All right. And notice no longer on this block do we have that drill in icon. On the masked library block, we don't have that drill underneath the hood block. We cannot go underneath it the easy way.
We can still right click on the block and see the contents of it, mask, look under mask. But we can't just drill in via the convenient arrow. If we want that capability, we've got to go in and unlock it. So we're going to say, lock library, make it unlocked, and links locked.
Now, the question is, what are-- these sound like they're the same thing. They both talk about locking links. So what's the difference?
The first one has to do with, is this library itself modifiable or not. If it says unlocked, you can modify it. If it says locked, you cannot.
The second one corresponds to the instances of it. This says, if it says links locked, that means you can't go over here and modify it over here. If it says lock links, that's telling you that it's right now you can. And if you want to click on this, then you would lock it.
So it is a little bit tricky in terms of interpreting the language here, or the meaning of the icon. When it's in this state, it's giving you a status. It's a status indicator. The links are locked.
When it's in the other mode, it's a command. It says, lock the links. It's a verb at that point. So it's like an adjective versus a verb the way they phrase it here.
So in this case, we want to-- we want to go with the-- we want to go with the unlocked state so that would be-- we want it to say lock links. That means it's actually unlocked. So now, if we go over to, let's say, this block here, the unmasked version, and I wanted to change something about the subsystem like, let's just say again, something simple. I just send it to I'm going to change it to 0.02.
OK. And I want to change this to 0.98. Again, it warned me that this is part of a library. Now, at this point, if I go back to this block from where it came, it didn't change anything. It still says 0.8999. But let's say I test this version, I like it, and I want to pop-- I want to push the changes back into the library block.
I could do that. I could, say, right click over here, library link, push link at this point. And now, if we go over to this block, we open it up. Now, it says 0.98. Let's just blow that up some.
It says, 0.02 and 0.98. So now, the changes have been fed back up to the original library. OK. So that's the way you go from the bottom back up to the top, from the instance to the repository.
We could, of course, go the other way around. In this case, let's just say I wanted to change this from 0.02 to 0.05 and 0.95. Now, I want to save that. I'm going to-- and now, let's just take a brief look over here. .0.05, 0.95, it was changed.
So now-- and, of course, if I would have had 10 of these blocks, if I would have had something like this, like this, and like this, and I go in over here and I said, 0.07 and 0.93. And now if I-- and save it. You need to hit Save.
And now, let's go over to look at all of these, 0.07, 0.93. And, of course, we changed them all. We didn't have to do anything to these individual instances. Where if we'd been using subsystems, we certainly would have.
All right. So that's some of the things you can do. And then afterwards, if you make these changes, you probably want to seal it back up. You can say lock links, lock the library, and you're good, OK?
The same process really applies to the math subsystem. So if I were to do the same thing, I could unlock the library. I could make the instances now modifiable. I could go underneath this. I could modify the mask. I could do anything over here to modify things.
In fact, in this case, I'm just going to do a move. I'm just going to move it and just do an aesthetic change here. Save it. And now, let's go over here to the instance of it. And you'll see that that block got moved up, OK? Magic tricks.
Now, if we wanted to go the other direction, if we wanted to go under this block and, now, I wanted to modify it like this, move it down here, it says you need to disable this link. Sure, I'll do that. Go down here. We'll move it-- whatever. It's not very pretty down there, just maybe right there.
OK. Now, go back up. I want to push-- now, I have to push these changes, library link, push. Now, we go underneath this and we see that it moved it down. So any change you make, whether it be aesthetic, whether it be wiring, whether it be parameter values, they're going to be reflected in the other one when you push and/or save the library, whether you're going from the library to the instance, or from the instance up to the library.
Now, in addition to doing these things via point and click and using these buttons and using the library block, the library repository itself and/or the model, you can also do things via the command line. So I'm going to relock things up. When I really lock things up, you're going to notice this arrow over here, it's going to go away. It's not going to allow me to The arrow's gone now. I'll delete these extra instances.
Now, another thing you can do in Simulink is do everything you do point and click you can do programmatically. So what I'm going to do is show you a command called set param and link status. So I'm going to select this block and I'll type GCB, and that's going to tell me the name, the path to that block. It's the name of the model, and then the path to the block, leaky integrator SSMLB.
Now again, note right now-- oh, let me look under the mask, control u. If I try to do something, can't do it. It's locked, OK? So now, let's do something about that. We can say, set param GCB, the current block, link status. And I'm going to say none. This says completely sever the link back to the library from which it originated. Boom.
When you do that, go up, notice, oh, oops, I messed up. I didn't have that block. I need to select that block. I was down inside it. Let me do that one more time.
Now, when I have that block selected and I look, now I get this arrow. Now, I can go underneath it. I can change anything I want to. I could change this to 2 times fb. And there's no complaints about you're modifying a link block-- nothing like that because it has been completely severed.
Now, the downside of that, of course, is I can't propagate, or push, those changes back up through the library. If I wanted to do that, then I'd have to actually open up the leaky integrator library, drag this block up in here, and create a new library block. OK. But in order to do that, I would need to unlock the library, unlock it.
Now, it's unlocked. Now, I can bring in a new component if I wanted this-- if this was a fundamentally new design and I wanted to bring that, make it a part of my library. In this case, I don't want to.
So you can see there's many ways. And as far as these commands, there's many variations of the parameters you can pass, link status. And there's also ways to do the pushing and restoring via this link status, as well.
So if I go to the Help, let me go to helper here. You go to a section called control, or control link block programmatically. You'll find there's ways to lock, do the lock links operation, the one I talked about earlier, via on and off. There's how you do it. You specify the name of the library, lock links to library, on and off.
There's also one for the modifying the library directly. Remember, this is for modifying inside of the model instance. If you to modify the library itself, then you would specify the name of the library and you would put lock here and on/off. So just slightly different commands.
And here, you see there's ways to do things, like, none. What I did to break the link, you can make it inactive with this, temporarily disable it. You can do restore, and you could do propagate, which is push the changes back up to the library. All of these things can be done programmatically using this Git param, set param, on the link status, OK? This is the parameter we used for set parameter and forget param.
OK. So we won't go into all the programmatic l. I just wanted to get a view, a feel for using libraries, why you would use them, and how you could modify them and push those changes in either direction. Again, I hope that was very helpful. So until next time, thank you very much for tuning in.

Featured Product
MATLAB


Select a Web Site
Choose a web site to get translated content where available and see local events and offers. Based on your location, we recommend that you select: United States.
You can also select a web site from the following list
Americas
- América Latina (Español)
- Canada (English)
- United States (English)
Europe
- Belgium (English)
- Denmark (English)
- Deutschland (Deutsch)
- España (Español)
- Finland (English)
- France (Français)
- Ireland (English)
- Italia (Italiano)
- Luxembourg (English)
- Netherlands (English)
- Norway (English)
- Österreich (Deutsch)
- Portugal (English)
- Sweden (English)
- Switzerland
- United Kingdom (English)