Create Reverse Motion Driving Scenarios Interactively
This example shows how to create a driving scenario in which a vehicle drives in reverse by using the Driving Scenario Designer app. In this example, you specify a vehicle that completes a three-point turn.
Three-Point Turn Scenario
A three-point turn is a basic driving maneuver for changing directions on a road. The three segments of a three-point turn consist of these motions:
Drive forward and turn toward the opposite side of the road.
Drive in reverse while turning back toward the original side of the road.
Drive forward toward the opposite side of the road to complete the change in direction.

You can use reverse motions to design more complex scenarios for testing automated driving algorithms.
Add Road
Open the Driving Scenario Designer app.
drivingScenarioDesigner
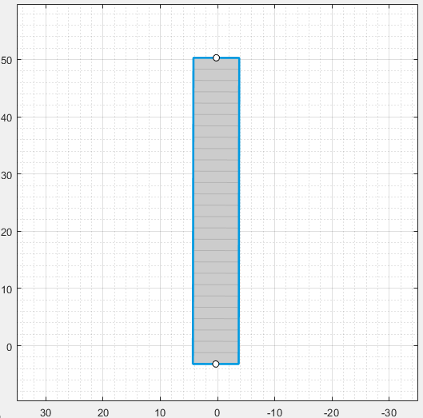
Add a straight road to the scenario. Right-click the Scenario Canvas pane and select Add Road. Extend the road toward the top of the canvas until it is about 50 meters long. Double-click to commit the road to the canvas.

Expand the width of the road to leave enough room for the vehicle to complete the
three-point turn. In the left pane, on the Roads tab, increase
Width (m) from 6 to
8.
Add Vehicle
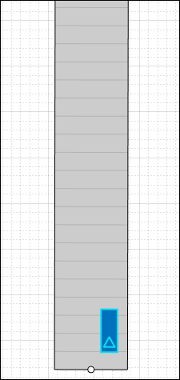
Add a vehicle to the road. Right-click the bottom right corner of the road and select Add Car. Zoom in on the vehicle and the first half of the road, which is where the vehicle will execute the three-point turn.
Add Trajectory
Specify a trajectory for the vehicle to complete a three-point turn.
Right-click the vehicle and select Add Forward Waypoints. The pointer displays the (x,y) position on the canvas and the motion direction that the car will travel as you specify waypoints.

Specify the first segment of the three-point turn. Click to add waypoints that turn toward the left side of the road.
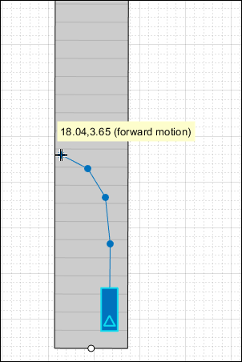
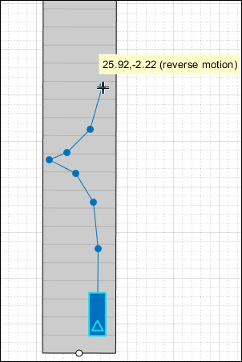
Specify the second segment of the three-point turn. Press Ctrl+R to switch to specifying reverse waypoints. Then, click to add waypoints that turn back toward the right side of the road.
Specify the third segment of the three-point turn. Press Ctrl+F to switch back to specifying forward waypoints. Then click to add waypoints that turn back toward the left side of the road, adjacent to the first specified waypoint.
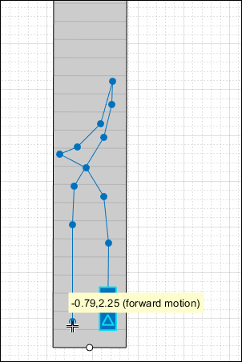
Press Enter to commit the waypoints to the canvas.
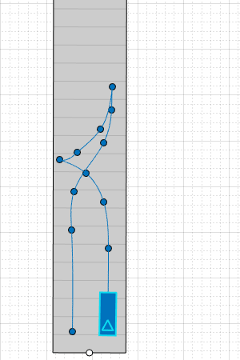
Run Simulation
Run the simulation. To view the direction that the car is traveling, on the app toolstrip, select Display > Show actor pose indicator during simulation.
As the simulation runs, the vehicle briefly stops between each point in the
three-point turn. When switching between forward and reverse motions in a trajectory,
the app automatically sets the v (m/s) value at the waypoint where the
switch occurs to 0.

Adjust Trajectory Using Specified Yaw Values
To fine-tune the trajectory, set specific yaw orientation angles for the vehicle to reach at specific waypoints. For example, as the vehicle begins its reverse motion trajectory, suppose you want the vehicle to be at exactly a 90-degree angle from where it started.

First, determine the ID of the waypoint where the vehicle begins this reverse motion
by moving your pointer over that waypoint. Then, in the Waypoints, Speeds,
Wait Times, and Yaw table in the left pane, set the yaw
(deg) value of the corresponding row to 90. For
example, if the vehicle begins its reverse motion at waypoint 5, update the fifth row of
the yaw (deg) column.

During simulation, the vehicle is now turned exactly 90 degrees from where it began. To clear a previously set yaw value, right-click a waypoint and select Restore Default Yaw. You can also clear all set yaw values by right-clicking the vehicle and selecting Restore Default Yaws.