Run PX4 Hardware‑in‑the‑Loop Simulation with Quadcopter Plant on Speedgoat
R2026bThis example shows you how to run a hardware‑in‑the‑loop (HITL) simulation for a quadcopter, in which the controller runs on a PX4® autopilot and the quadcopter plant model runs in real time on Speedgoat® using the UAV Toolbox Support Package for PX4 Autopilots.
Prerequisites
1. If you are new to Simulink®, watch the Simulink Quick Start video.
2. You must install QGroundControl to create and upload the UAV mission used in this example.
3. Complete the Set Up Speedgoat for HITL Simulation with PX4.
4. Install the UAV Toolbox Support Package for PX4 Autopilots. Select the installation topic appropriate for your operating system.
At the Select a PX4 Autopilot and Build Target step of installation, specify these options::
PX4 Autopilot board — PX4 autopilot board that you use to run this example
Build Target — Build target with the
_multicopterkeyword.
5. Configure and set up the PX4 autopilot in HITL mode. For more information, see Setting Up PX4 Autopilot in Hardware-in-the-Loop (HITL) Mode from QGroundControl.
6. You must start two instances of MATLAB® to run this example.
Use the first MATLAB instance to deploy the quadcopter controller model to the PX4 autopilot.
Use the second MATLAB instance to run the quadcopter plant model on the Speedgoat target.
Getting Started in First MATLAB Instance
Launch the first instance of MATLAB. To access the Simulink model, supporting files, and project shortcuts that this example uses, open the px4demo_HITLSimulinkPlantSpeedgoat.prj project file.
prj = openProject("px4demo_HITLSimulinkPlantSpeedgoat");Copy the current folder path of the first instance of MATLAB to the clipboard.
clipboard("copy",pwd)Deploy Controller Model to PX4 Autopilot
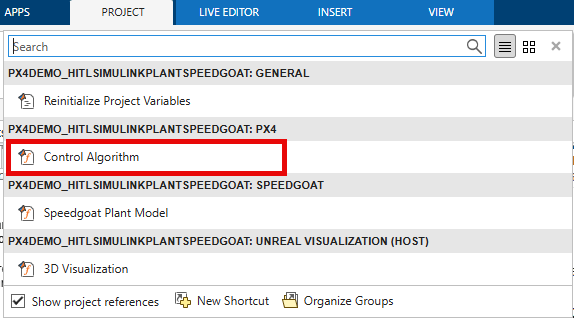
To open the Quadcopter_ControllerWithNavigation.slx Simulink model, on the Project tab of the MATLAB Toolstrip, in the Shortcuts section, click the Control Algorithm shortcut.
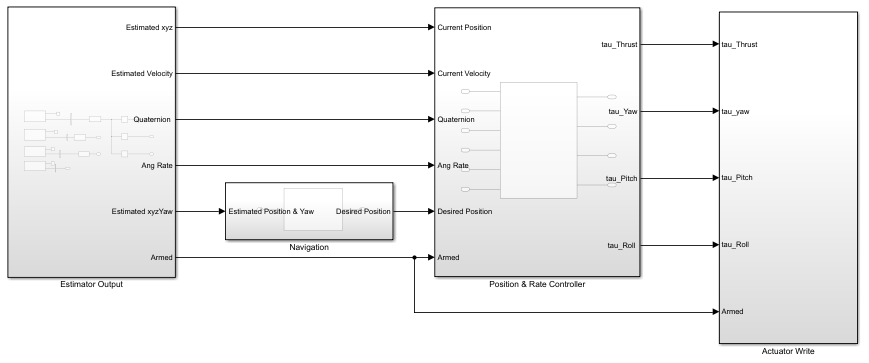
The Quadcopter_ControllerWithNavigation.slx model contains a subsystem that reads estimator output from the PX4 autopilot, a subsystem that implements a position and rate controller, and a subsystem that writes actuator values to the PX4 autopilot. For more details on how to design a quadcopter position controller for PX4 targets, see the Design and Tune Quadcopter Position Controller for PX4 Autopilot example.
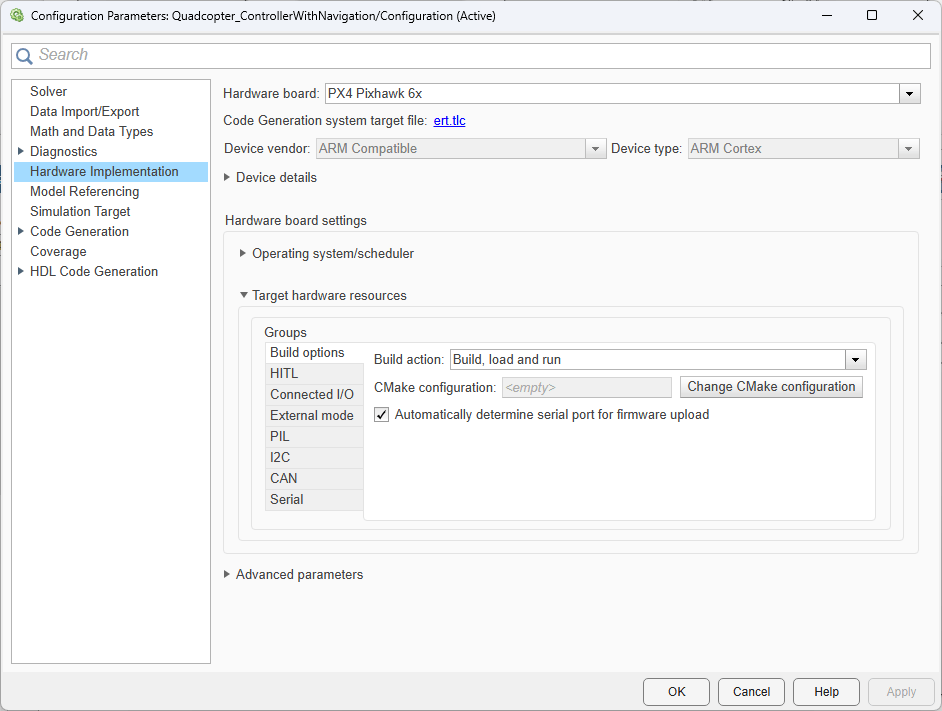
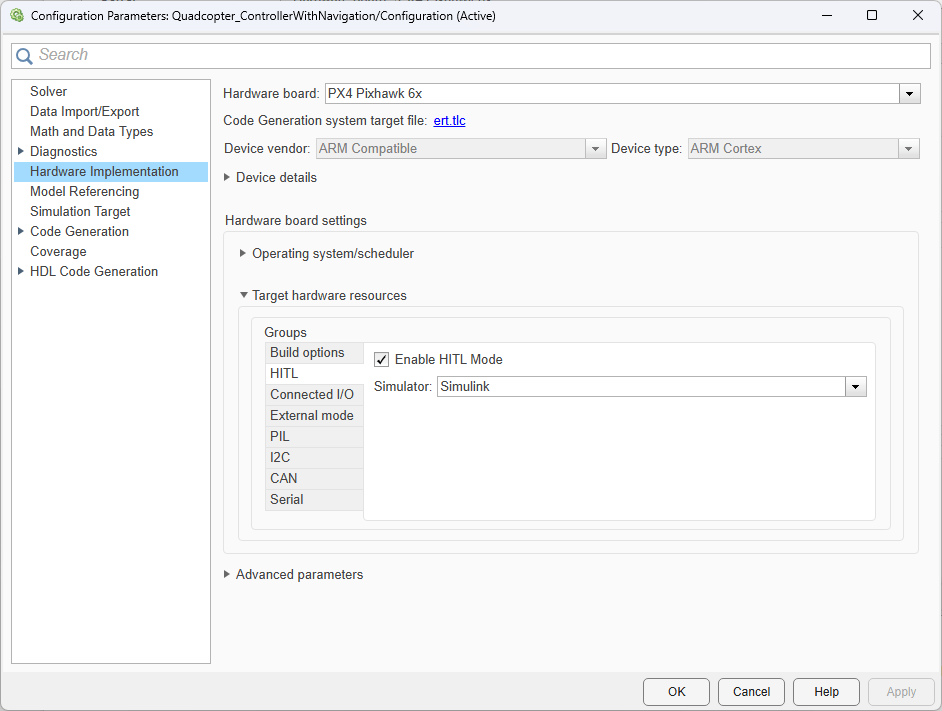
On the Simulink Toolstrip, on the Hardware tab, click Hardware Settings. In the left pane, select Hardware Implementations, and verify these options:
Hardware board specifies which PX4 autopilot to use to run the model. This example uses
PX4 Pixhawk 6x.In the Hardware board settings section, under Target hardware resources, select the Build options tab of the Groups pane. Note that Build action is set to
Build, load and run.Select the HITL tab of the Groups pane. Note that Simulator is set to Simulink and Enable HITL Mode is selected.
To generate the code of the flight controller model and deploy it to the PX4 Autopilot board, select Build, Deploy & Start on the Hardware tab of the Simulink Toolstrip.

After completing deployment, the model launches QGroundControl.
Note: If you are using Ubuntu®, QGroundControl might not launch automatically. To launch QGroundControl, open the terminal and go to the folder where QGroundControl is downloaded and , and then enter this command: ./QGroundControl.AppImage.
Getting Started in Second MATLAB Instance
Launch a second instance of MATLAB. Then, right-click the current working directory in the address bar and paste the folder path of the first instance of MATLAB by selecting Paste and Go.
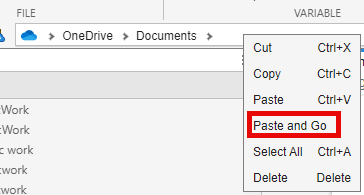
To access the Simulink model, supporting files, and project shortcuts that this example uses, open the px4demo_HITLSimulinkPlantSpeedgoat.prj project file.
prj = openProject("px4demo_HITLSimulinkPlantSpeedgoat");Deploy Plant Model on Speedgoat
To open the UAV_Dynamics_Speedgoat.slx Simulink model, on the Project tab of the MATLAB Toolstrip, in the Shortcuts section, click the Speedgoat Plant Model shortcut.
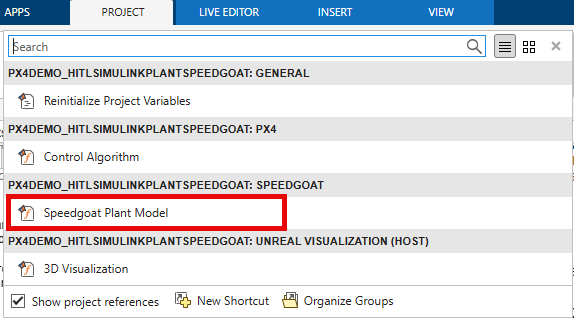
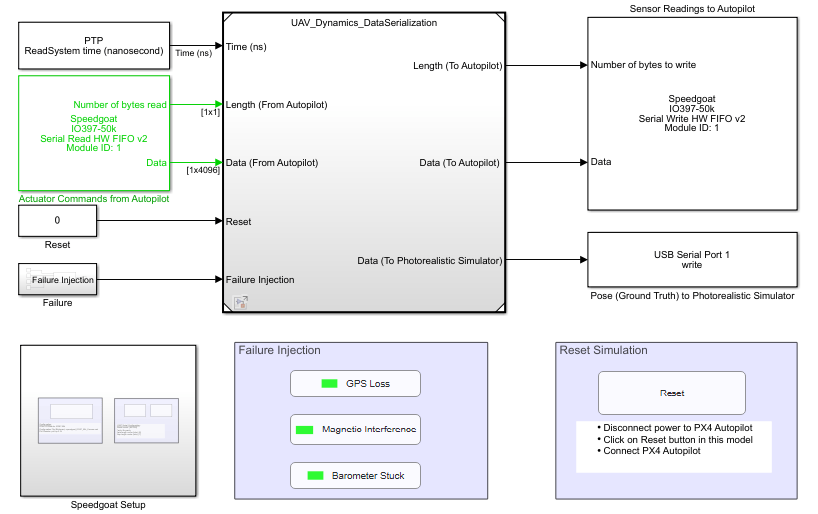
The UAV_Dynamics_Speedgoat.slx model contains a subsystem that models quadcopter plant dynamics. For more details on how to design plant models for for PX4 targets, see the Run PX4 Software-in-the-Loop Simulation with Quadcopter Plant in Simulink example. The model also contains the Failure Injection section which has switches that enables you to simulate GPS loss, magnetic interference, and faulty barometer.
Open the Speedgoat Setup subsystem.
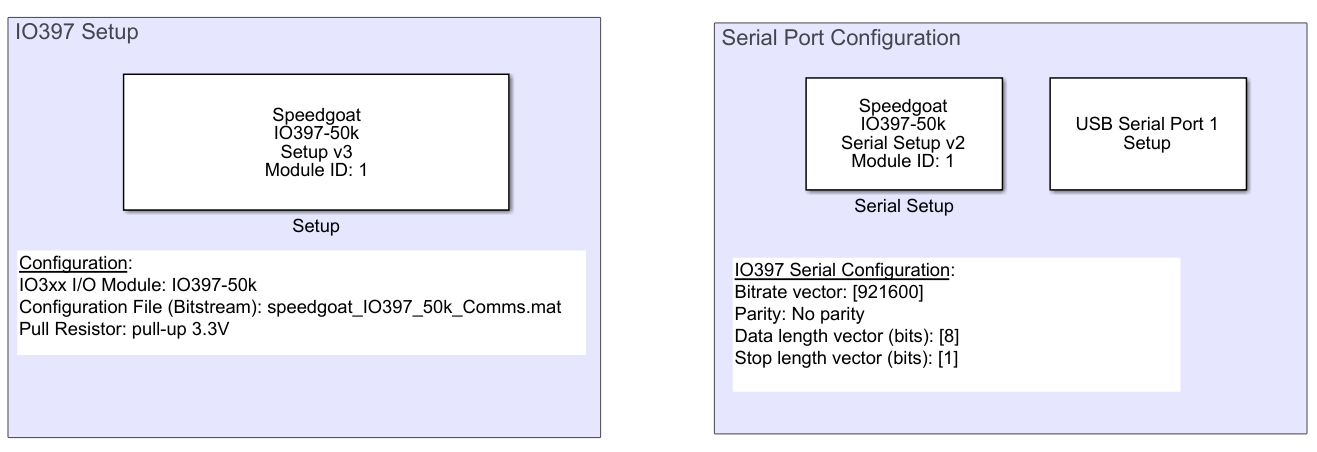
In the IO397 Setup section, open the Setup block, and verify these options:
Hardware specifies the I/O module used by the Speedgoat hardware. This example uses
IO397-50k.Configuration File specifies the configuration file of the I/O module. This example uses the
speedgoat_IO397_50k_comms.mat. Download this file from the Speedgoat Customer Portal.Pull Resistor specifies the resistor used by the I/O module. This example uses
pull-up 3.3v.
In the Serial Port Configuration section, open the Serial Setup block, and verify these options:
Bitrate vector specifies the baud rate of the serial connection. This example uses 921600.
Parity set to
No parity.
In the Serial Port Configuration section, open the Setup block, and verify these options:
Number of data bits specifies the number of data bits in each transmission. This example uses 8 bits.
Number of stop bits specifies the number of stop bits in each transmission. This example uses 1 bit.
To deploy and run the plant model to Speedgoat:
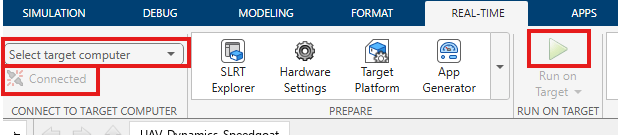
Click the Real-Time tab on the Simulink toolstrip.
In the Select target computer drop down, select the Speedgoat hardware.
Click the connect toggle under the drop down to start connection with Speedgoat.
Click Run on Target to run the plant model in Speedgoat.
Create and Start Mission in QGroundControl
Open QGroundControl, the configure and assign the actuators of the quadcopter. For more details, see Configure and Assign Actuators in QGroundControl. After you have completed that step, you can create a mission in QGroundControl, upload the mission to the UAV, then start the mission. For more information on how to design, upload, and start mission in QGroundControl, see the Create and Upload Mission section of the Run PX4 Software-in-the-Loop Simulation with Quadcopter Plant in Simulink example.
(Optional) Visualize Simulation in Unreal Engine®
To visualize the mission in Unreal Engine:
1. Using the first instance of MATLAB, deploy the controller model to the PX4 Autopilot.
2. Using the second instance of MATLAB, deploy the plant model to the Speedgoat.
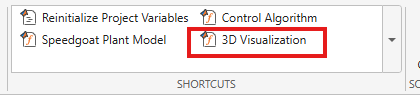
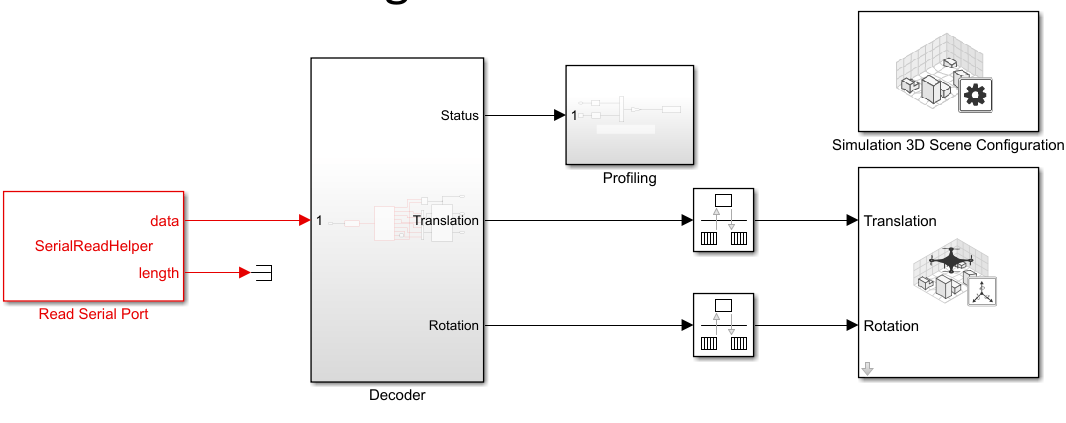
3. Using the first instance of MATLAB, open the Unreal_3DVisualization.slx model by using the 3D Visualization shortcut, then run the model.
4. Create, upload, and start the mission in QGroundControl.

