Label Very Large High-Resolution Images Using Image Labeler
The Image Labeler app enables scalable and efficient labeling of big images that may be too large to fit into memory. These include:
Multi-resolution tiff images
Gigapixel images
Geospatial images
Whole-slide images
Tiled images
To support large-scale image annotation, the app converts oversized images into a blocked image format. This approach divides the image into smaller, memory-friendly blocks, allowing for batch image annotation. You can label each block individually, just as you would with standard images, enabling seamless scalable image annotation workflows.
Import Blocked Image into Image Labeler
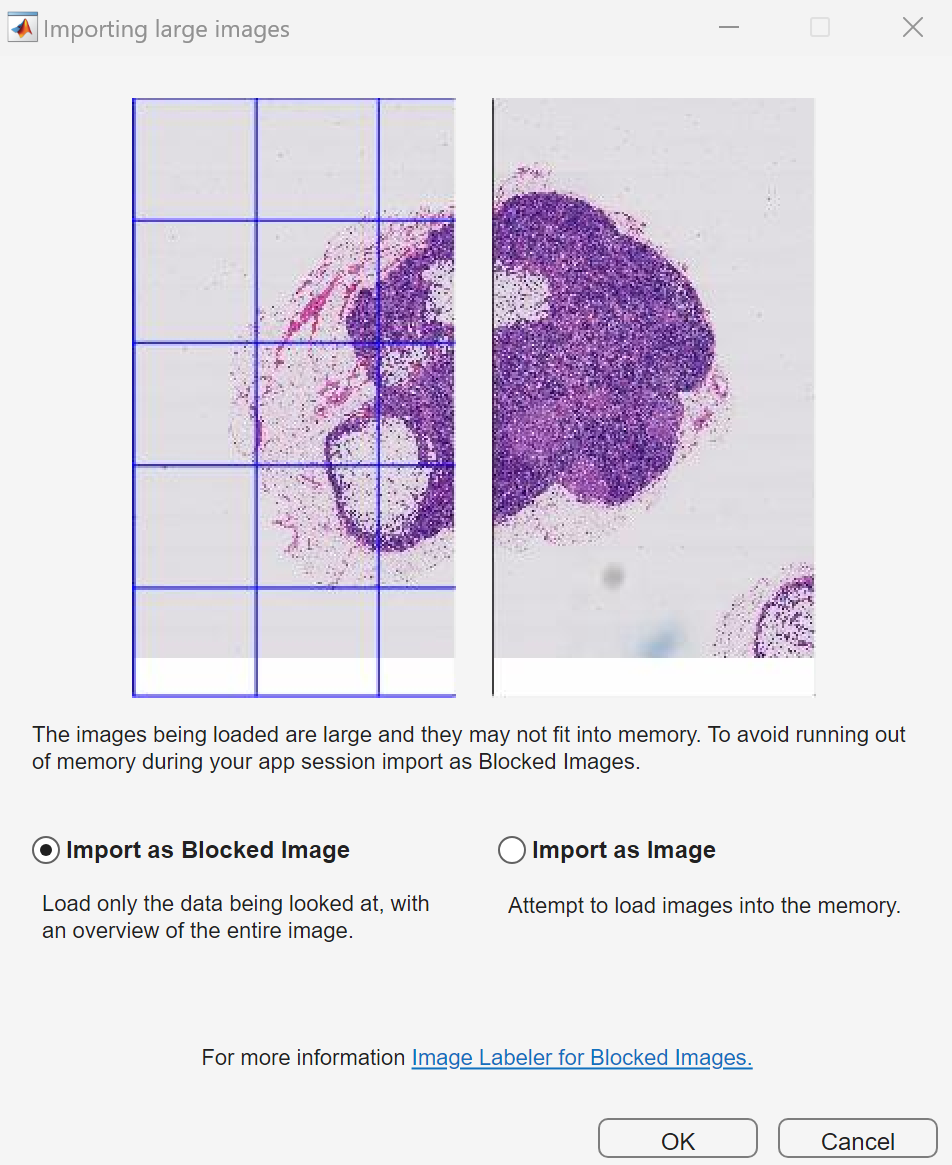
When loading images into the Image Labeler app, if an image appears to be too large to fit into memory (having at least one dimension larger than 8000 pixels) or is a multiresolution image, the app displays the Importing Large Images dialog box, which offers you the option to convert the image into a blocked image. The image on the left side of the dialog box represents a blocked image, with visible grid lines to show how an image is divided into blocks. To choose to use a blocked image, select Import as Blocked Image and click OK.
Initially, the app loads blocks that form the center of the image (50% of image height
and width). For multiresolution images, the app chooses the resolution to use depending
on how much of the image is visible. As you zoom in on an image, the app switches to a
finer resolution. For more information about displaying multiresolution images, see
imageshow.
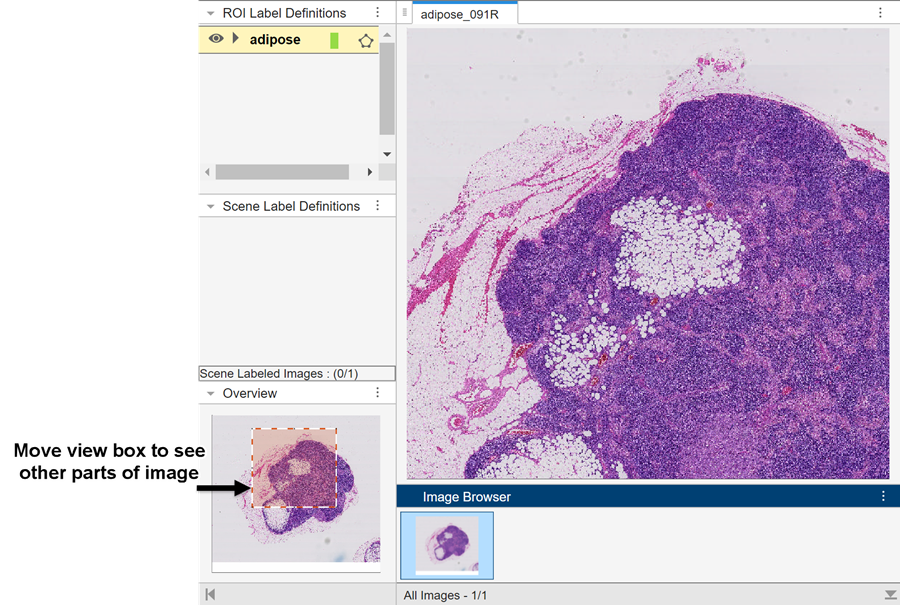
When using blocked images, the app also provides a view of the entire image in the Overview pane. In the Overview pane, the display overlays a box on the image that shows the portion of the image that is currently visible in the main view pane in the center of the app window. To view other parts of the image in the app, drag the view box to a different part of the image in the Overview pane.
Work with Blocked Images in the Image Labeler
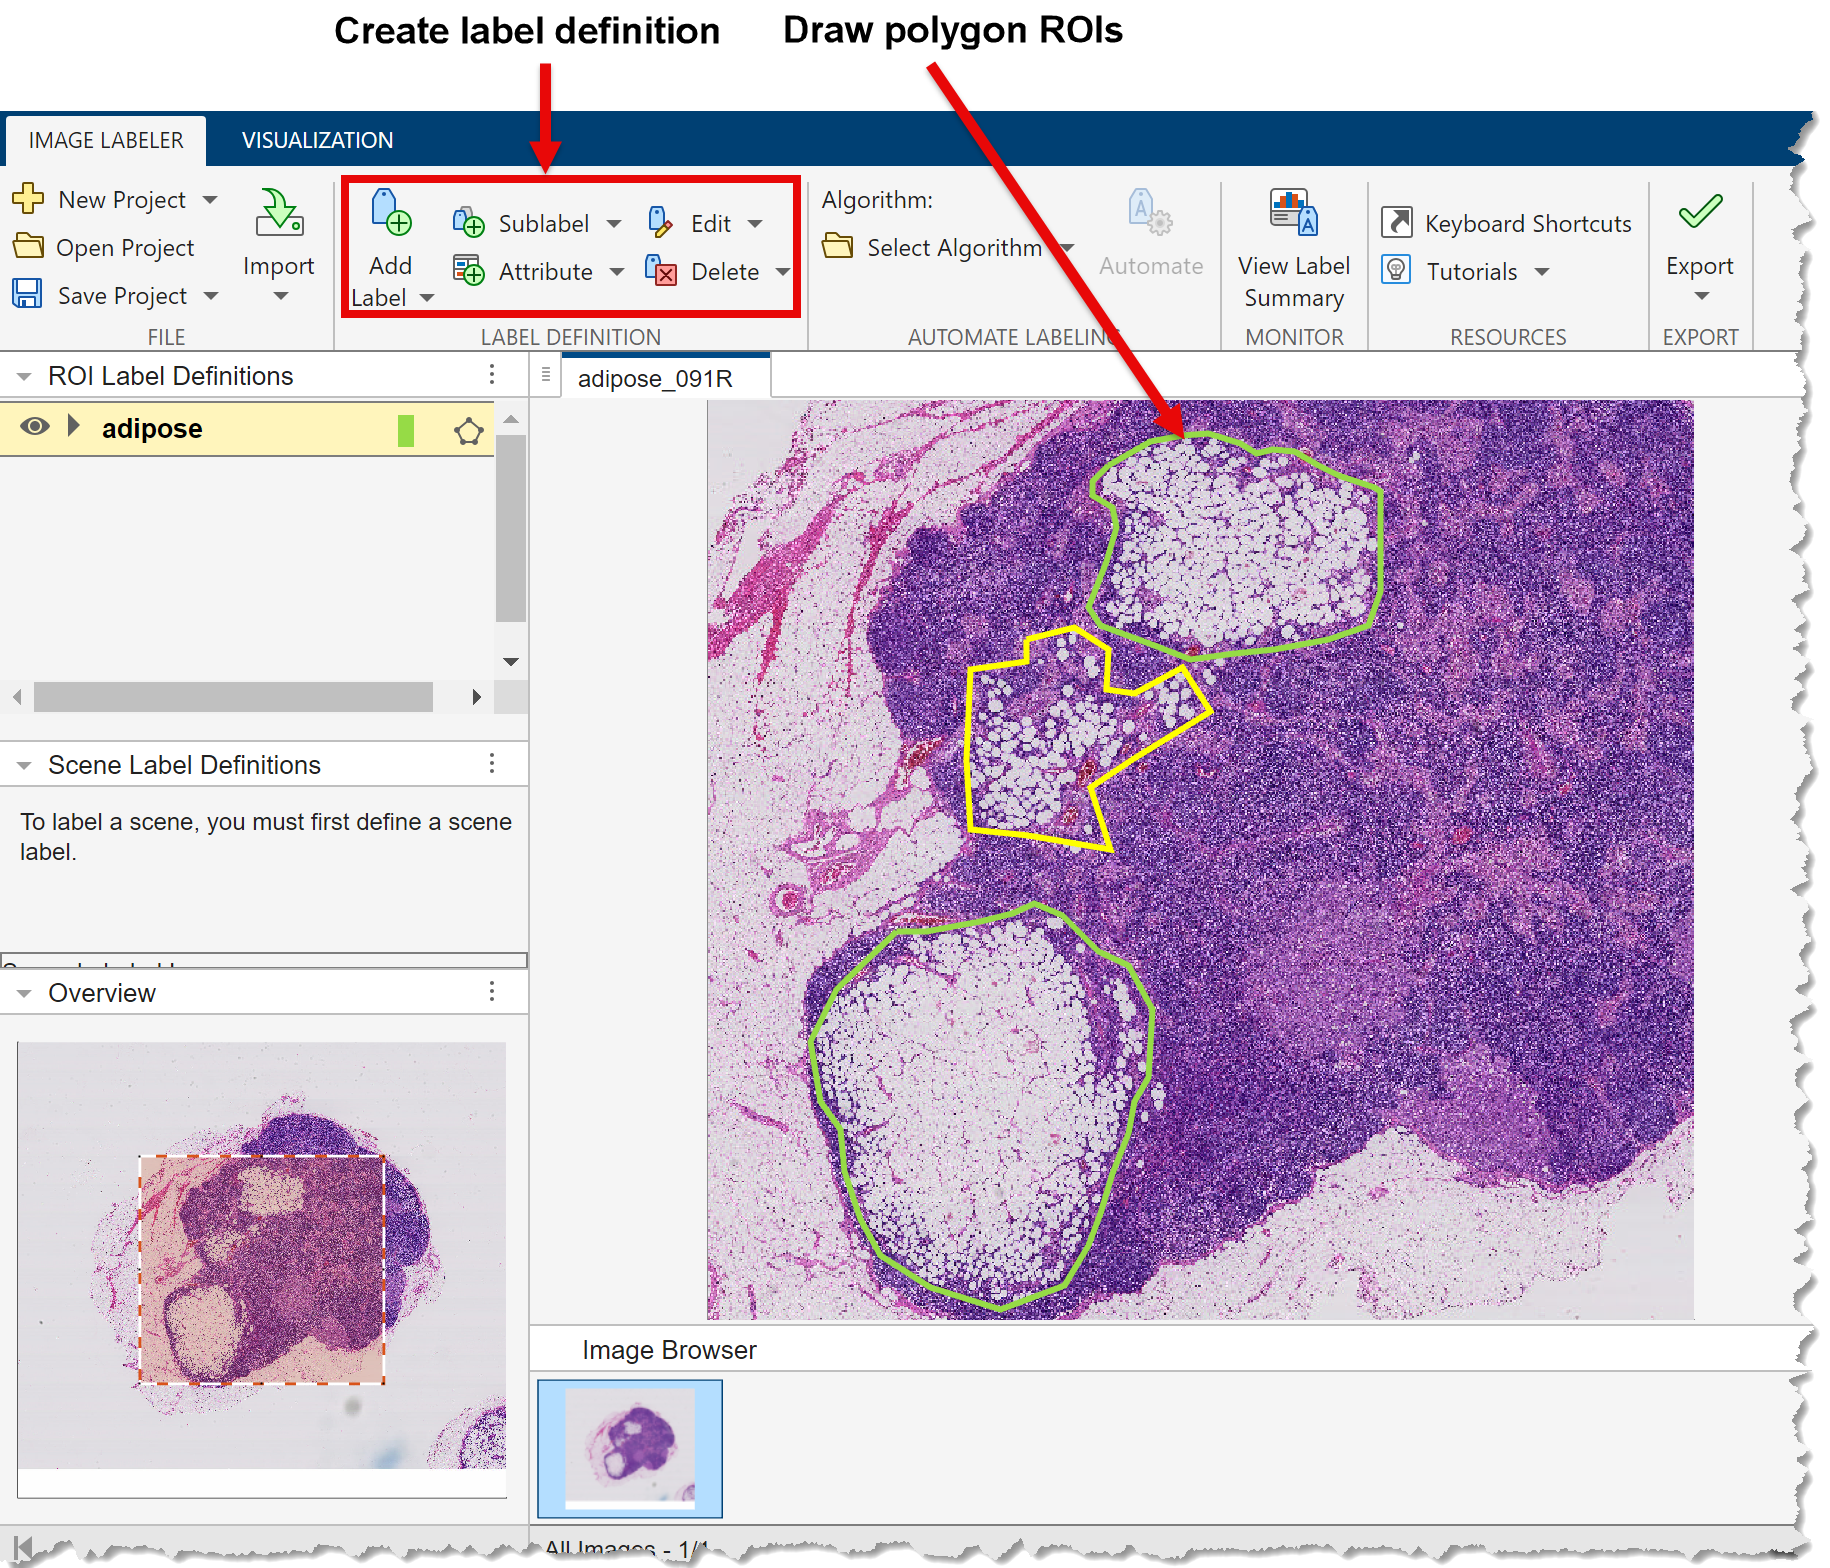
Once you load a blocked image into the Image Labeler app, you can
work with the blocked image as you would with nonblocked images. You can create labels,
sublabels, and attributes and, when you are finished labeling, you can export the labels
as a groundTruth object.
Limitations
Using blocked images enables you to label images in the app that do not fit in memory. However, there are some limitations with use of blocked images in the Image Labeler app.
Pixel labeling is not supported. You can only create labels using ROI shapes, such as axis-aligned or rotated rectangles, lines, and projected cuboid polygons.
When working with a multiresolution image, ensure that all versions of the image at different resolutions are spatially registered. In other words, the same real-world locations must be aligned across all resolutions.
Thumbnails of images displayed in the app cannot be rotated.
Use Blocked Image Automation with Images
With blocked images, as with nonblocked images, you can take advantage of automated processing to help with the labeling process. For example, with medical images, you can do automatic detection using blocked image automation. You can train an object detector deep learning network and use that in the app to automatically label areas with bounding boxes.
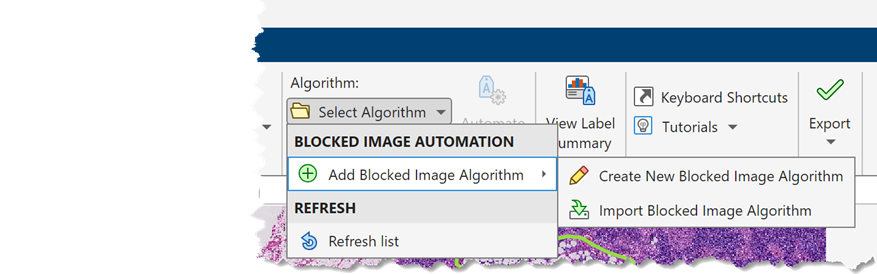
To use blocked image automation, click Select Algorithm, select Add Blocked Image Algorithm, and choose to either create a new algorithm, by selecting Create New Blocked Image Algorithm, or import an existing algorithm, by selecting Import Blocked Image Algorithm.
When you choose to create a new blocked image algorithm, the app opens a class file
template in the editor. The class subclasses
vision.labeler.mixin.BlockedImageAutomation. The template
contains stubs for standard methods that you must implement for your algorithm,
including the blockedImageAutomationAlgorithm method. For more
information about implementing this method, see blockedImageAutomationAlgorithm. Add the code you want the algorithm to
execute. For more information about creating labeler automation algorithms and where to
save this class file, see Create Custom Automation Algorithm for Labeling.
After saving the class file and adding the location folder to the path, click Select Algorithm in the Image Labeler app, and select Refresh list. You can select your new blocked image automation algorithm by clicking Select Algorithm, and then selecting your custom algorithm.

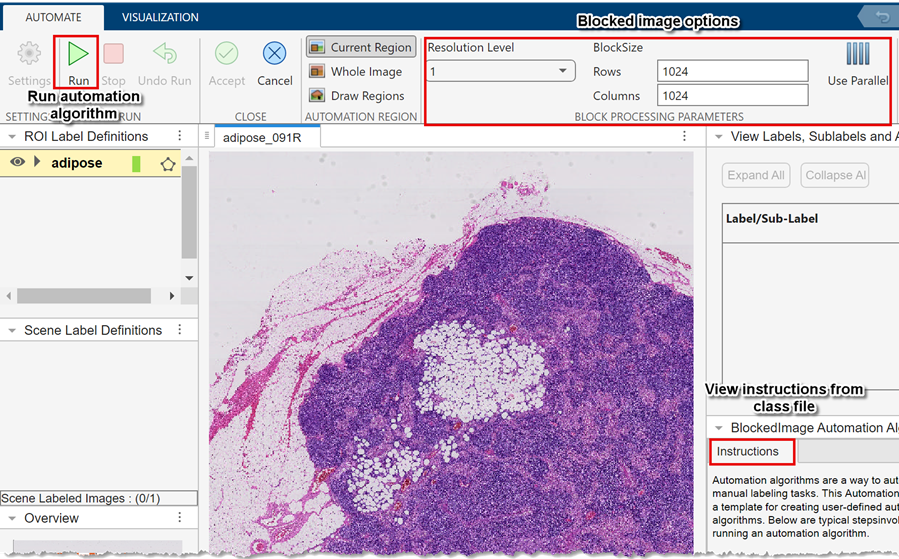
After you select your custom algorithm, click Automate. The app opens the Automate tab. Use this tab to control execution of your blocked image automation algorithm.
Determine what parts of the image the algorithm processes: the whole image, the current region, or a region that you specify by drawing an ROI.
Specify which resolution level you want to process. Level 1 is the finest resolution level. The resolution level with the highest number is the coarsest resolution level.
Specify the size of the blocks in the blocked image. By default, block size is 1024-by-1024 pixels.
Click Use Parallel to take advantage of parallel processing techniques.
Click Settings to access other parameters, if they are made available by the algorithm.
After you select the automation algorithm, the Automate tab appears. Any text instructions included about your algorithm in the class file, are displayed in the bottom-right pane of the app. The Automate tab also contains the blocked image processing settings, options to select automation regions, and run options. To run the algorithm, click Run.
Postprocess Exported Labels to Create a Labeled Blocked Image
You can convert polygon coordinates exported as a groundTruth object from the Image Labeler app into a labeled
blocked image using the polyToBlockedImage function. For more information, see Convert Image Labeler Polygons to Labeled Blocked Image for Semantic Segmentation.
See Also
Image Labeler | vision.labeler.mixin.BlockedImageAutomation | blockedImageAutomationAlgorithm