Radio Setup
Description
Add-On Required: This feature requires the Wireless Testbench Support Package for NI USRP Radios add-on.
Before you can start interacting with RF signals using Wireless Testbench™ features and a supported NI™ USRP™ radio, you must set up your radio by following the steps in the Radio Setup wizard. For a list of supported radios, see Supported Radio Devices.
The Radio Setup wizard leads you through several steps. If you close the
Radio Setup wizard at any time, you can start the wizard again with the
radioSetupWizard
function. If you encounter issues, these troubleshooting topics outline possible solutions:
If you have a Windows® host, see Configure Network Settings on Windows Host for manual steps to configure your network adapter settings to optimize the connectivity and performance of the network connection.
The Radio Setup wizard enables you to save and manage saved radio setup
configurations that enable Wireless Testbench workflows. Access your radio setup configurations or create a radio object for a
radio setup configuration by using the radioConfigurations
function.
Note
If you are using a Mac operating system, you cannot save a radio setup configuration.
Saved radio setup configurations are persistent across MATLAB® sessions. You must run the Radio Setup wizard again only if you want to set up a new radio or you want to manage saved radio setup configurations.
Open the Radio Setup
After installing Wireless Testbench Support Package for NI USRP Radios: Click Setup Now in the Add-On Installer window or the setup button
 in the Add-On Manager window.
MATLAB command prompt: Enter
radioSetupWizard.
Examples
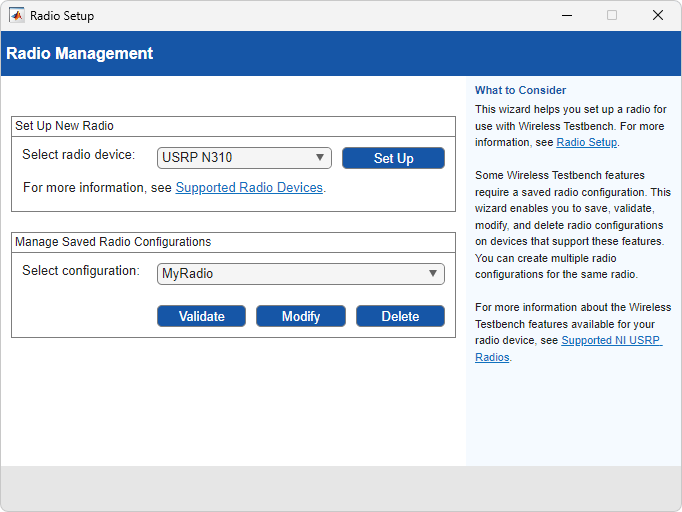
Enter radioSetupWizard at the MATLAB command prompt. The Radio Setup wizard for the Wireless Testbench™ Support Package for NI™ USRP™ Radios opens. Follow the steps in the wizard to set up your radio or manage radio setup configurations.
radioSetupWizard
