Build and Run Executable on TI mmWave Radar Board
Build and run a Simulink model as an executable on the ARM® Cortex® processor of the TI mmWave radar board..
Start by configuring your Simulink model for the TI mmWave Radar board as described in Configure a New Model for TI mmWave Radar.You can use Read Detections block to configure the radar and read detection in the ARM Cortex core of the TI mmWave Radar board.
Design your application in Simulink.
Connect the TI mmWave radar board to your computer’s USB port. Simulink will try to automatically detect the COM port. If you have multiple devices connected or encounter a COM port error, identify the correct port and specify it in the Configuration Parameters following the instructions in
On the Hardware tab, click Build, Deploy & Start. This action starts the process to compile the model, deploy it to your hardware, and begin execution.

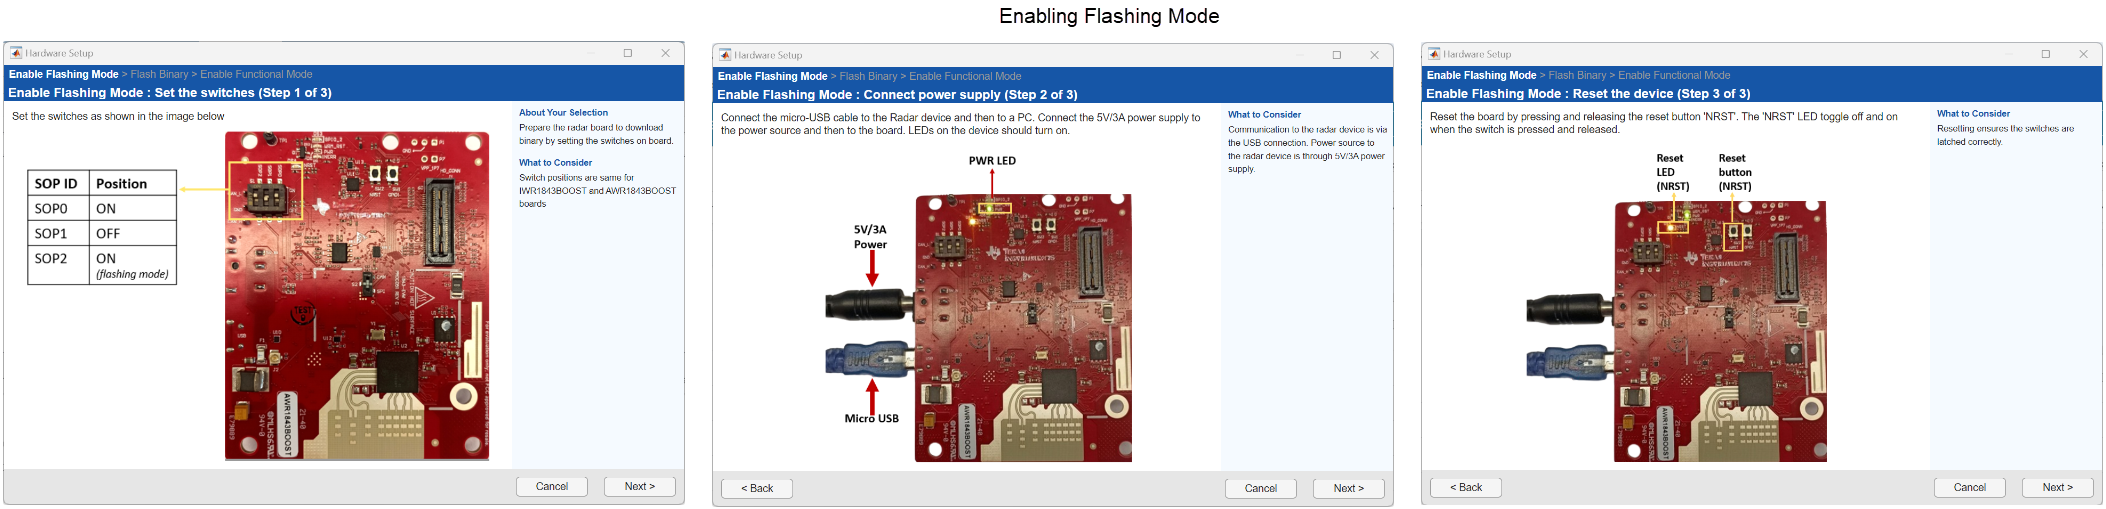
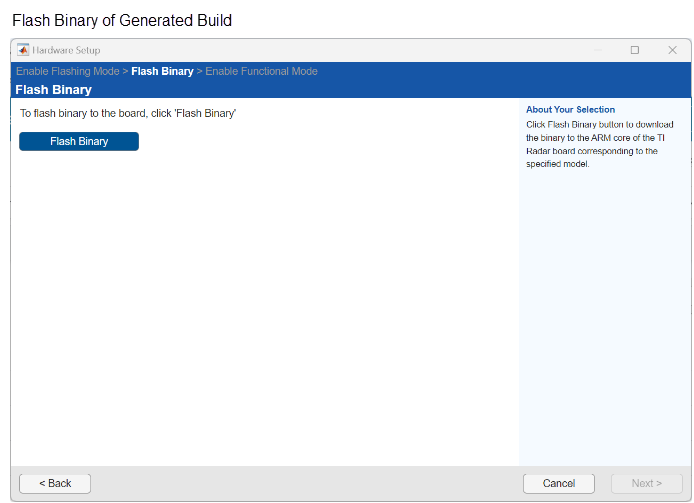
After building the executable, the Simulink window becomes non-interactive and the Hardware Setup windows appear, which guide you through the instructions to set the flashing mode of TI mmWave radar board, flash the binary of the generated build, and then return to functional mode. This process also involves changing the switch positions on the board, as described in the instructions. The Hardware Setup windows are updated depending on the board selected in Configuration Parameters. After completing each step, click Next on the window to proceed.
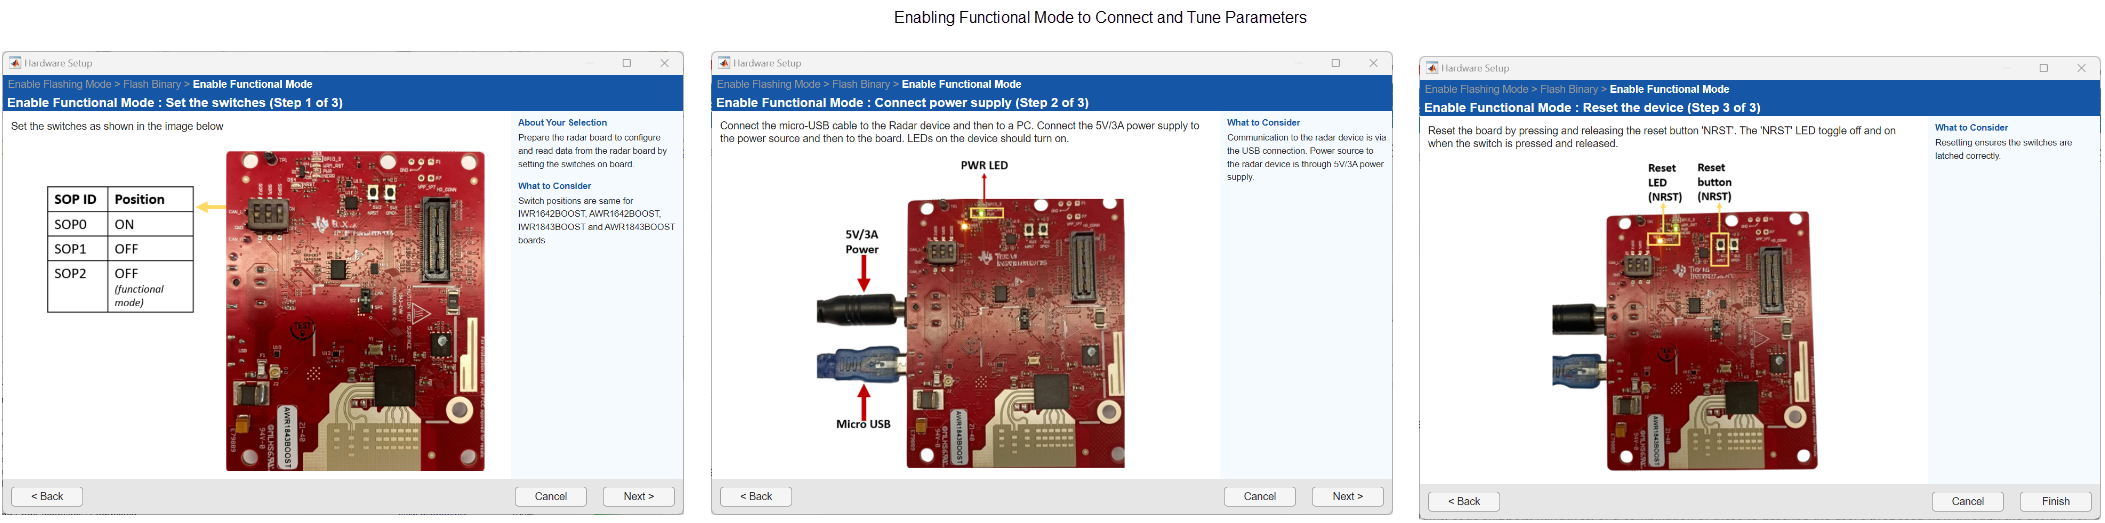
After clicking Finish in the last window of Hardware Setup and completing all required switch settings and reset steps, you can interact with Simulink again. The generated code starts running on your TI Radar device.